Friday, October 19, 2007

Glare

Since it only took me a day to get the max 2008 glare shader to work
"properly" whit in maya I just have to spill my guts about it here.

Ok, We'll start with the basics.
What is this glare thing I keep rambling on about and why should anyone care?

Glare (known as bloom in the computer game world) is a
phenomena seen when looking into very bright light
(namely in a high contrast environments) such as the sun
a cars headlights or a lit window late at night.
The source of light seems to be "glowing", it looks light you can actually see the light mid air.

Notice the effect by the lamp.


Ok, so we covered what it looks like, but we cant really see light midair. So what the heck is this glow thing?

Unlike many other camera artifacts this effects can be seen both in images taken with a camera as well as simply looking in to bright objects with your eyes. It is caused by scattering of light in the eye (some part of it, lets not get in to biology here)
,the film in an analogue camera and the CCD on a digital camera.

Used correctly this effect will give a subtle boost to the realism of a rendering. Use it in excess and the image WILL turn in to a "german-wedding-photo-effect".

Lets get back to the shader.
The glare shader was originally written by Lume as part of there light shader set. The lume shaders now come as a part of 3ds max.

To get this shader working in maya copy the lume.mi from:
3ds Max 2008\mentalray\shaders_standard\include
to:
maya2008\mentalray\include

and the lume.dll from:
3ds Max 2008\mentalray\shaders_standard\shaders
to:
maya2008\mentalray\lib

This is all you need to do to just get the glare shader to work with maya, however the lume.mi do kinda destroy the create render node window so you need to edit that file to some extent to get it all smooth. But if you just want to fool around never mind this and just delete the files when you are done.

This shader is an output shader, that means it applys to to the rendered image as a post effect. Select your camera and find the tab mental ray>primary output passes>secondary output pass
drag the Glare shader from hypershade (mental ray tab > ouput shaders) here.

Take a few seconds to breathe...ok, lets continue with shader settings.
Quality: ranges from 0 to 4, but has to be a minimum of 3 to work.
Spread: the spread of the glare, note that the light intensity at any given point also makes the glare spread more or less.
Overlay only: Doesn't work.
Verbose: Prints the progress in the output wnidow.
Streaks: Doesn't work.
Scale: Doesn't work.
Contrast: Doesn't work.
Specific Objects: Doesn't work.

No glare.

glare
Wednesday, October 17, 2007

3ds max 2008

Today the new version of 3ds max was made available
for trial download.
The news concerning mental ray is about the same as
in maya but with a more slick OEM integration.

Ill think play around with it for o while and then
its time o try to brake out the improved glare shader
and fiddle it in to maya.. but thats another post.

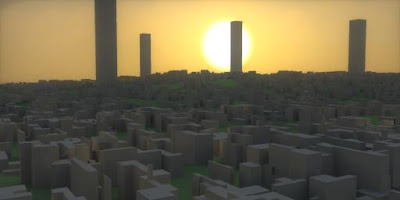
glare in action

Monday, October 15, 2007

Flicker free animation.

Todays experiment will ( as the title gives away ) handle
flicker free animation with mental rays final gather.

Edit:
Due to complications with my composting software I will be
unable to finish this experiment. This post will be updated as
soon as its is technically possible.

Friday, October 12, 2007

What to do when rendering.

One of mans first and most important questions:
What on earth am I supposed to do while i wait for this rendering
to finish?

I'll present 3 things which makes my rendering time fly.

1. Physically and mentally abuse the local stuffed animal.
In my case a stuffed animal in the form of a hen
(he.. yes he, is also our director).

2. Surf aimlessly around the Internet in the search for some fact no one
really needs to know, like which animal has the longest tail as percentage of there body.

3. Search the entire server for all files containing the
word force majeure (seems to be about 6 here).


I believe this image speaks for itself.

Wednesday, October 10, 2007

GI the Rambo way.

If Rambo ever got the idea to do some global illumination he would do it the most brute force way there ever was. In mental ray this method is called path tracing.No mumbojumbo, no cryptic controls or shaders.

It is all super mega ray tracing, which means two things:
1. It's super accurate.
2. It's super silly slow.

There are a few things to keep in mind when path tracing. Most important is to use only the path_material, and since this is brute force there are no photon shaders or such needed. In your render settings be sure to disable all photon techniques ( GI and caustic ) as well as final gather.

As we are about to use pure ray tracing as GI we need to make sure that our standard ray tracing depths are high enough to distribute the light through out the scene.

Last but not least, we need a ton of samples to get the render smooth.
( You probably need to look into the oversampling_lens )

Here is an example of the difference between samples, these images were rendered
with min/max 2/2, then oversampled with the oversampling_lens.
Those over samples are the image annotations.

Note. render times are per full frame (415x415)
the images were cropped for easier compare.

In conclusion.
This special technique might not be something you would want to use in your pipeline. But it's always a plus to know as much as possibly about your tools of trade.

The mia_lens_bokeh shader.

Todays mental ray experiment focuses on lens artifacts
such as chromatic aberration, scratches and blooming/glare.

First of: chromatic aberration.
Chromatic aberration is an artifact often seen when using
low end or wide angle lenses. Due to the colors different wavelengths
and the differing index of refraction on the lens, the color spectra
gets separated, mostly on high contrast parts of the image.
( for a more correct explanation take a look at this wikipedia page )

One way to produce this effect is to use the new
bokeh shader shipped with Maya 2008 (mia_lens_bokeh).
The result produced this way will not be at all physically correct
but will give a similar look to the rendering.

Ok, lets see some example.

Top image image taken with a higher quality lens producing no chromatic aberration.
Bottom image taken with a wide angle lens producing substantional chromatic aberration.

Next let's look at the result we get from our bokeh shader

Notice that we only get the effect on the out of focus regions.
This is due to the use of the bokeh shader which is a depth of field shader.

The setup to get this result is really quite simple.
What you need to edit on the shader is the following:
  • Check the "Use bokeh" check box
  • higher the bokeh samples (or the image will render black)
  • load a color map texture in the "Bokeh" slot
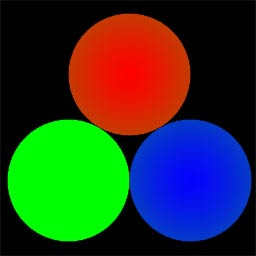
The texture used in the rendering above is a really crude RGB map
that look like this.


Thats all on chromatic aberration for now.

Tuesday, October 9, 2007

Bravia #3

Heads up for the third sony bravia TV commercial.
This time its all stop motion made by passion pictures.
Thought this clipp would be the perfect start to this blog
( both bunnies and colors! ).

Kinda sandboxing here.

I really don't have any things to blog about at the moment.
But I'll add an image just to test this new awsome blog.


Ok. that did not work at all, I'll give it a try later on.